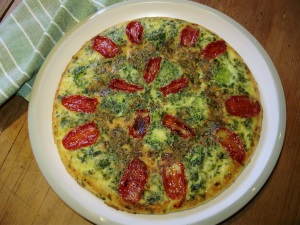
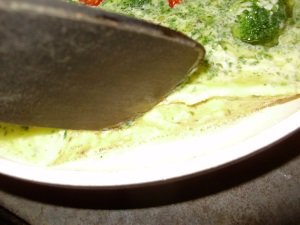
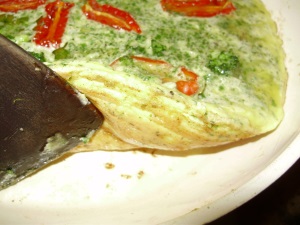
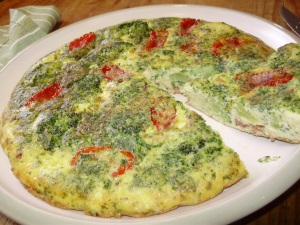
 Broccoli, tomato and parsley frittata |
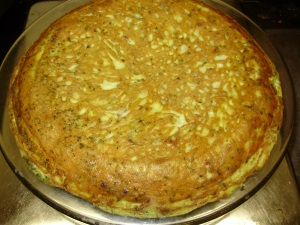
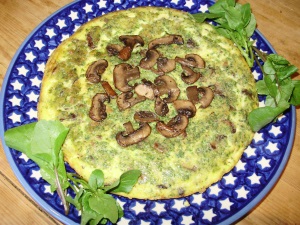 Watercress, mushroom and bacon frittata |
This month I’ve made Fritattas – a kind of Italian omelette which you can put virtually anything into. Almost more like a quiche without the pastry – they’re not as fast as a French omelette, as they’re cooked very slowly over a low heat. In all they take about 25 minutes to half an hour – but while they’re cooking you can make a salad and dressing to go with whichever one you’re making so that you then have a complete meal. And if you’re feeding extra-hungry teens – you could even have some filling baked potatoes or potato wedges in the oven to go with it.
Frittatas are endlessly versatile and are a very useful recipe to have up your sleeve at any time of year – but are particularly so now, when some produce can be getting scarce if you grow your own vegetables. You may only have a few bits and pieces of fresh veg left which wouldn’t be quite enough on their own but you still want to use somehow. If you don’t have fresh veg, you can use frozen – cooked before adding, or you could even use up any scraps of leftover cooked veg lurking in the fridge!
Like the last two months they use ingredients that are seasonal and easily available everywhere, if you don’t grow your own. Another reason they’re seasonal is at this time of year if you have your own hens, this is the time when they start laying really well again so you should have plenty of eggs – perhaps even a glut.
They’re cheap to make – just 6 – 8 eggs and 4oz cheese will feed four people nicely. Both organic cheese and organic eggs are available from all leading supermarkets now. The price of the basic egg and cheese recipe, plus a small pack of bacon lardons works out at about 4.50 for a family of four (priced at Aldi/Lidl using 8 organic eggs, a 1/2 pack of mature organic cheddar and one small 1/2 pack of non-organic bacon lardons). It would be even cheaper if you don’t use bacon and just use some of your own veg as a filling. (If you have to buy salad to accompany it, that would obviously be a little extra – but as this is ‘From Tunnel to Table’ – if you grow your own salad in a tunnel, greenhouse or under cloches – you should have plenty of salads at this time of year – if you’ve been following my blog!).
They’re very frugal and even prevent food waste because they’re a great way to make the most of a very small amount of additional ingredients or leftovers. You can use whatever you like as a filling. They’re one of what I call my ‘seat of the pants’ recipes – using whatever happens to be in the fridge at any moment! The only limit is your imagination or your pocket! Some of our favourites are bacon, broccoli and tomato – mushroom and bacon – courgette, parsley and basil – smoked salmon and asparagus, or dill – mixed herbs etc.
They’re very healthy, with a low GI if that worries you, can be suitable for vegetarians if just using veg as a filling – and they’re also gluten-free.
They’re delicious either warm, at room temperature or cold the next day – so they’re great ‘grab and go’ picnic food too. This recipe even freezes well if you make it in my own way, using cream – which I’ve never seen anyone else using in a frittata. I actually found this out by freezing some once which was disgusting – because it sort of separated when thawed. So I tried cream in it, as I can freeze quiche perfectly well which contains cream. Eureka – it worked! So you could even make a couple at the weekend and stash them in the freezer either whole or in wedges, for when you only have time to throw something like a pizza into the oven! Or simply thawed and eaten cold it’s perfect.
Ingredients :
For the first ‘Tunnel to Table’ frittata we tasted, I used a few small pieces of left-over broccoli from the previous night’s supper, that I didn’t want to waste, some fresh chopped watercress from the polytunnel and a few frozen semi-dehydrated Rosada cherry plum tomato halves from last summer. I added the chopped watercress into the egg and cheese mix, then waited about 5 mins or so before adding the just thawing tomatoes and the broccoli pieces, to prevent them sinking to the bottom of the uncooked egg and disappearing completely. The colours looked really pretty as you can see.
For the second frittata I used a 250g pack of organic chestnut mushrooms* cooked until golden, a small pack of bacon lardons* cooked until crispy and golden before adding – and plenty of chopped parsley from the tunnel. I kept a few of the mushrooms back to garnish the top.
Here is the basic frittata recipe – go anywhere you like from here:
8 medium/large organic eggs
4ozs organic mature cheddar cheese grated (or you could use any other cheese you like – goat’s, Feta, Gruyere – experiment!)
2 tablespoons of cream* (this is important – without the cream it won’t freeze as well)
1oz butter or oil for the pan – which should be about 9ins/23cm in diameter across the top – give or take.
Freshly ground organic black pepper – and a pinch of salt if not using bacon which can be a bit salty.
That’s it! And of course whatever other ingredients you want to throw in as well – such as cooked bacon lardons, cooked mushrooms*, any other cooked veg, fresh herbs etc. Anything that’s handy or needs using up.
Method:
(Step by step pictures at the bottom)
1. Whichever frittata you’re making, have all the ingredient ready chopped, cooked, defrosted or whatever – and assembled to hand – before you start cooking – because things tend to happen quite quickly once you put everything into the pan.
2. Whisk the eggs in a large bowl, add pepper, grated cheese, cream and chopped herbs if using. Season with pepper and salt. (Don’t use salt if using bacon lardons as they will add a lot of salt) If you’re adding bacon lardons cook them first in the pan until golden and crisp then let them cool a bit, before adding into the egg and cheese mix.
3. Put the butter or oil in a 9 inch/23cm (top measurement) non-stick frying pan and heat until bubbling and hot – but not browning.
4. Pour in the mixture then turn down the heat as low as it will go. This is easier on an electric ring or the slow side of a range cooker top. With a gas ring you may need to use a heat diffuser or a heavy baking sheet underneath to prevent the bottom cooking too quickly and burning. Don’t stir – just leave it alone for a few minutes.
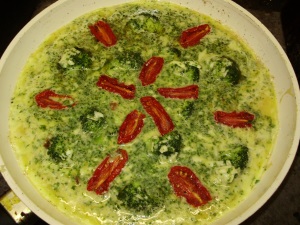
5.. When it’s been cooking for a couple of minutes and has started to firm a little at the sides and bottom, throw in any extras you want to see on top when it’s finished – such as pieces of broccoli, tomatoes etc. That’s unless you don’t mind them sinking – in which case put them in as soon as it’s in the pan. I’m just fussy about how things look!
6. Leave it to cook very gently for about 15 mins or until the top is barely still soft and has a slight wobble. Just run a spatula around the edge at this stage to loosen and lift the edge slightly to see if it’s just golden brown underneath. Don’t let it get too brown or it will be tough.
7. If you have a grill, at this stage you can put it under a grill for a minute or so to finish cooking the surface – but don’t brown it. You can grate a little bit of extra Parmesan* on top before putting it under the grill and brown it just slightly if you like – this gives it a nice cheesy crunch.
8. If like me you don’t have a grill you can slide it onto an oiled plate at this stage and then turn it over onto another hot plate which you have ready in the oven to finish it cooking through or slide it back into the pan. After it’s finished cooking, then you can then turn it right side up again. (If you’re doing this – make sure that the top it almost firm beforehand if you don’t want runny egg all down you!)
9. Serve cut into 4 or 6 wedges, with a nice fresh mixed salad and also perhaps some nicely crisp baked potatoes or potato wedges if you’re feeding very hungry people – but it’s actually quite filling.
This recipe freezes brilliantly if you leave it until cold and cut it into portions or leave it whole. It heats up again very well either microwaved, or in the oven, but we prefer it at room temperature.
*Ingredients availability note for Ireland*.
Both recipes used organic cheese and organic eggs which are available from all leading supermarkets now. Non – organic bacon lardons are available everywhere too.(I can never understand why people call organic eggs – ‘organic free-range eggs’. Organic eggs are by definition free range, they have to be under EU law. Free range, pastured or anything else are not however organic – or even necessarily GM-free if fed on non-organic, manufactured concentrate rations!)
Organic bacon lardons are available online from www.organicmeat.ie and also from several farmer’s markets at Coolanowle Organic Meats.
Organic chestnut mushrooms are available in Marks and Spencer, from www.organicsupermarket.ie or from Denis Healy’s Organic Delightsstand at many farmer’s markets, including Leopardstown, Red Stables Clontarf and Drogheda.
Organic single cream is available from Irish firm Glenisk in some supermarkets. Double cream is what I generally use and that’s available widely from M&S again and also from Sainsbury’s (Newry is my closest – I do a car sharing trip with a friend about every 3 months to stock up on organic goodies we are deprived of in the Republic! Well worth the 45 min drive – and plenty of time for a good gossip too!)
Organic Parmesan is also available from Sainsbury’s.
Remember – You can also follow me on Twitter on the website button here – or @nickykylegarden – and you don’t need to have a Twitter account to do this – you can still see my Tweets with gardening and cooking tips every day – you just won’t be able to access all conversations.
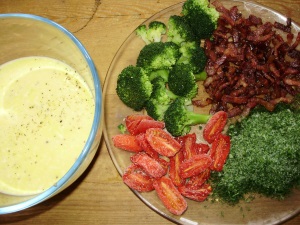 1. Extra ingredients all assembled ready to go – with the egg and grated cheese mixture ready mixed in bowl. |
 |
 |
 |
 |
 |
 |