As I write this, I’m listening to yet another named storm raging over us – this time it’s Storm Isha! I first posted this on the blog about 10 years ago, but I’ve decided to update it again, as it helps to take my mind off my own polytunnels and stops my eyes from constantly watching the window! I also thought I’d do it while we still have power, which usually goes off here in even minor storms, as our electricity connection comes from a post in the field opposite our gate, and since we were connected, two other houses have been connected to the same post and I think it can’t cope with the load! There has already been a lot of damage countrywide. My trees are currently bending double and although we’ve been through some serious storms here before, and we’ve done everything we can to prepare – storms are such an unknown quantity and so unpredictable.
Sadly, with increasing climate change, we will see many more of these storms – and I must say that having warned for many years about increasing climate change, which I could already see happening in the mid-1980’s, and having organised an event at the National Botanic Gardens in 1992, just after the first Rio Climate Summit, it is so disappointing that so few people listened then to those who could see it happening. Thirty years ago, it could have been slowed or possibly even reversed! Instead of that, the last thirty years have been wasted while governments around the world continued with business as usual, ramping up fossil fuel use, and many people have just continued to do all the things which caused it and are rapidly making it worse.
I sincerely hope that all your tunnels are safe, but if not – I hope that any damage is minimal and that my suggestions below be of some help and possibly save the cover of your tunnel.More stormy weather is likely for this winter, so if there are even the slightest of small tears in covers – it’s worth strengthening them NOW with tunnel tape, which will help to prevent them getting worse or perhaps losing the polytunnel altogether. This method can also save greenhouse glass too, if there are cracks or even complete panes broken – something which again I’ve experienced here, having lost three greenhouses before I gave up on them and decided that polytunnels were the only option on our very windy site.
I have recently seen some suggestions on social media that it is better to leave tunnel doors open in rough weather – but from my own experience it is far better to keep them as tightly closed as possible.Winds in such strong storms can be very unpredictable and can swirl around and change direction very suddenly. If you leave the downwind doors open as one or two people suggested – I know from my own experience that the tunnel can just take off if the wind suddenly gusts from a different direction that wasn’t predicted.
I lost my very first polytunnel in the Great Storm of 1987 because the cheap roll up door blew into the tunnel and then up through the roof! Then I lost another polytunnel two years later that had been put up by a man who said he was experienced at erecting polytunnels – it turned out that he wasn’t! He had tacked the polythene on at one end before he realised there wasn’t enough to reach to the other end – he then forced it to stretch too much and pulled it too tight – slightly bending the frame. At the first sign of wind it just collapsed like a house of cards. I lost not just the polythene but also the frame as well -so it was a very expensive lesson. Although he had been recommended by my local polytunnel suppliers at the time – I very stupidly didn’t ask for other references! So, I know how upsetting it is to lose a tunnel completely, as I did 30 years ago! If you’ve been unfortunate enough to lose yours, I can sympathise – but all is not completely lost – because even if the frame is weakened, it can still be useful. I now use that old frame as a fruit cage and chicken run instead!
Since then, I’ve always got the suppliers themselves to erect them as I describe later – then they are responsible if it’s not done properly! I also have properly closing doors on both of my new stronger-framed tunnels – one has sliding doors and the other has a hinged-type opening door. I definitely think the more expensive option of the sliding door is worth every single cent! It’s very easy to vary the width of the opening to allow the doors to be opened in even quite windy weather, depending on direction, which you can’t do with the hinged doors.
Here’s a list of what you will need:
1. A large roll of see-through tunnel tape. You should be able to get this from your local farm or horticultural supplies shop, they usually have them in stock as there are so many polytunnels around now. Or if your polytunnel supplier is near enough, they’re sure to have it. There is also a type of Sellotape sold in DIY stores for garden use – but the rolls are smaller and not quite as effective in my experience.
2. A large roll of a good absorbent kitchen paper towel.
3. A large pair of scissors.
4. A stable stepladder that won’t wobble if the damage is not within easy reach.
5. Someone to help hold the stepladder steady for you – (most important!) and also to hold an umbrella over you if it’s raining while you’re working outside, as the polythene must be kept dry while you’re working on it or the tape won’t stick! If you’re mending a hole along the side, it also helps to have someone to hold something flat and softish, like a garden kneeler, against the side for you to push against to firm on the tunnel tape, otherwise it’s easy to make the hole bigger when you firm on the tape.
To mend a small or middle-sized tear:
Mending a hole or tear up to about 4-5ins long that’s within reach is fairly easy – but needs to be done immediately to avoid the wind catching it and causing possible further damage.
Get all your equipment ready and keep it dry in a bag or bucket – don’t put ot down on damp ground.
Start on outside of the tunnel first, if it’s within reach.
First wipe dry the area all around the tear – to about 4-5inches 10cm or so from damage – with 3-4 large pieces of kitchen towel. Do this twice with two changes of towel to ensure that the surface is as dry as possible.
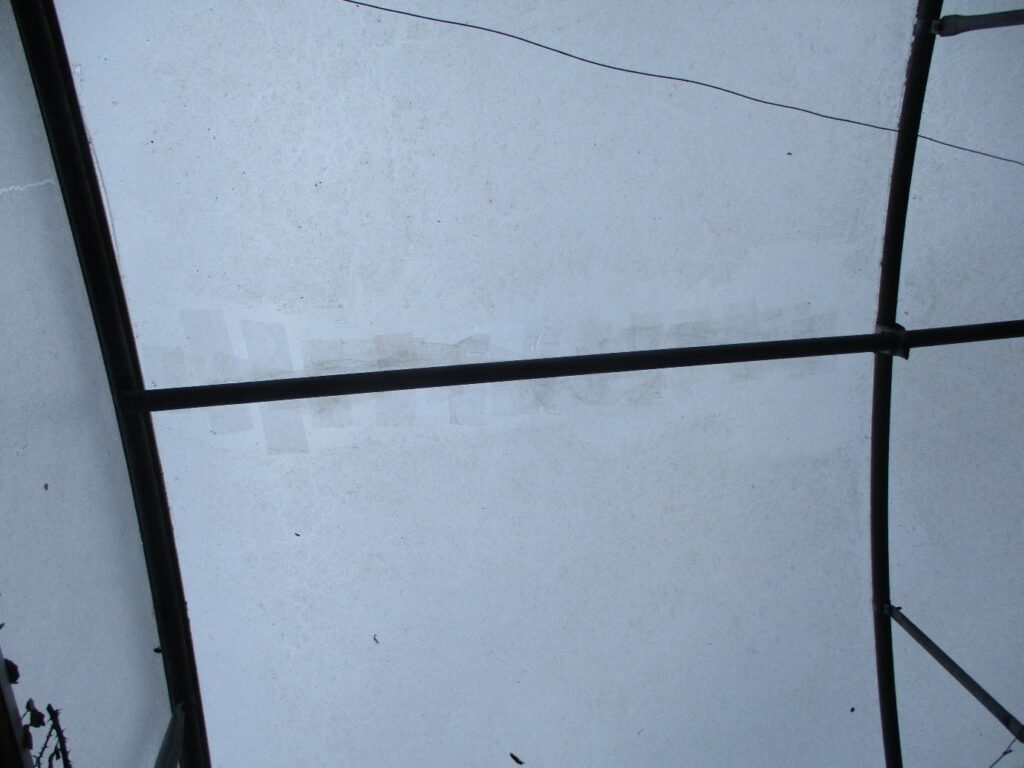
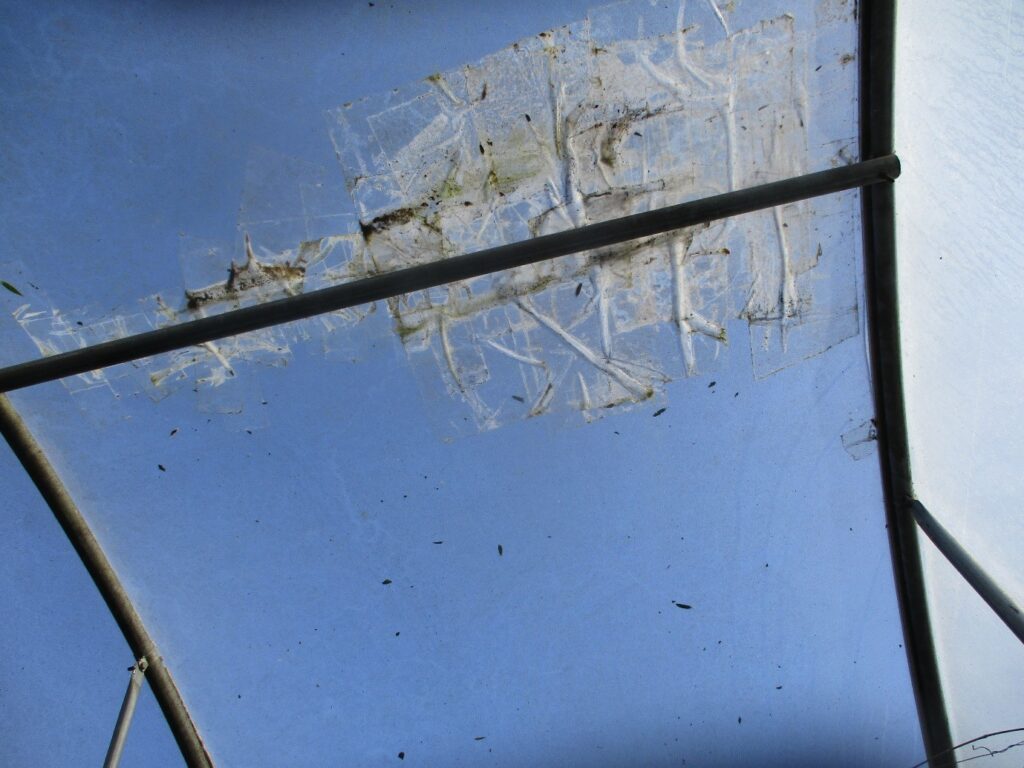
If it’s only a small tear or hole just cut off enough tape to mend to about 2ins-3ins either side of the damage and press the tape gently onto the area, working from the middle of the tear out, to avoid air bubbles which will attract moisture and possibly undo the mend gradually. Once you’ve stuck it to the tunnel cover, use the rounded handle of the scissors to gently rub all over the area, working along the length of the taped bit, as if you were brass rubbing! This really seals the tape mend and squeezes out any small air pockets. You will see the area gradually become clearer, which means it’s really stuck.
Then do exactly the same inside immediately, repeating the process of drying off the area thoroughly etc. again. You may think that it’s dry enough in the tunnel, but even your breath will create humidity which will affect the area to be mended, and will make the seal less effective.
To mend a larger hole or tear:
Go through the same process again of drying off, starting on the outside.
Cut enough of the tape to ‘stitch’ across the tear to about 4-5ins either side of the damage, start in the middle, pulling it together, then work out from there either side, and literally doing large ‘cartoon’ stiches across the damage first. If it’s very large, having another pair of hands to pull the tear together really helps – but I have often done this on my own.
Make sure the damaged/stitched area is still dry enough, if you’re not sure then rub with kitchen towel again and then go along the whole of the damage length ways, going further out from the stitches over the whole area with the tape. This is because if you don’t – wet can get under the stitches and the whole area may come undone if it gets wet inside. Again, rub over the whole area with handle end of scissors – (or the back of a large tablespoon as a person suggested to me recently who had mended her polytunnel using my advice).
If you have someone to help – get them to stay outside while you repeat the process again on the inside, getting them to hold their hands flat over the area, to give you something to work against when putting on the tape and ensuring it sticks. You ideally want as few air bubbles as possible under the polytunnel tape when doing this. Don’t try to skimp on the tunnel tape when doing this – more is definitely better, and is a helluva lot cheaper than having to buy a new polytunnel cover!
To mend a tear in a tunnel roof where you can’t get at the top outside without a cherry picker!
First – make sure you’ve got someone to hold the ladder – the voice of bitter experience here!
Go through the same process as for the larger tear or hole, making sure it’s really dry, getting a piece of tape to stitch across the middle of the tear first. It it’s large enough to get your hand through to the outside and you can reach, put one hand on the outside and then you can push against it.
Once you have done that – the first strip of tape should hold the area steady enough to enable you to get the rest of the tape on, again ‘stitching’ across larger areas first, then going along. It should also be strong enough to rub the handle of the scissors over the area as before. It’s also often a good idea to reinforce a large area with additional polythene if you have some handy. Doing this can give you a good seal which will last for years – I promise! Believe me I’ve mended some really huge holes this way, and they’ve lasted until the tunnels were due for re-covering several years later.
If you’re just putting up a new a tunnel – it can be useful to save all those off-cut bits of the polythene that may seem too small to be useful! They can come in handy later for mending large, difficult tears. I’m an avid recycler (some would say hoarder!) and I can guarantee that if I throw something out – I’ll probably want it a couple of weeks later. ‘Sod’s Law’! If you don’t have any off-cuts – then go to a local bed or furniture store and ask them very nicely for a polythene mattress cover (threatening to weep helps if they’re mean – but they’re usually intrigued, and very nice!). They’ll always have these hanging around from new show bed mattresses etc. The polythene is normally strong enough to cope with mending a large hole if well put on – and they’re actually also just the right size for covering areas of my 4ft wide raised beds in spring, to dry them off a bit!!
If the tear is too big to attempt to repair in any way at all – even without using a large extra patch of polythene – then sadly the best thing you can do is to literally just cut your losses, get a sharp knife and cut off all the polythene completely. If you leave it flapping around in the wind like a sail – it will gradually distort the frame, weakening it and it will be useless for using as a polytunnel again. Sorry! Not complete despair though – you could still use it as a fruit cage or hen run!
My polytunnel history!
I put up my very first tiny 6 x 8 polytunnel/plastic ‘Garden Relax’ brand polythene greenhouse in our very first garden over forty years ago now! That was the beginning of a love affair with these incredibly productive and useful things. When we moved to our current home, I started growing organic veg commercially. After losing three greenhouses, I decided that polytunnels were the only option here, as they can flex and move just a little, which a greenhouse can’t. One crack and a greenhouse is gone in a high wind, which I learnt to my cost as I went along.
The first commercial- sized polytunnel was the cheapest big model which produced great crops. It was one of those 13ft x 65ft ones, where you could only grow tall crops in the middle and the sides were very low. The only problem was that on our very windy site, the roll-up doors could potentially catch in the wind and blow inside the tunnel, going up through the roof! That was how I lost that one in ‘Hurricane Charlie’!
After that I got two more of that size as they were the cheapest option but also the lightest frame. As I earned enough from all my hard work in each, I would buy another – ending up with 3 of those smaller ones, and then an 18ft x 54ft much taller one at the bottom of the hill where it was more sheltered. That was luxury indeed! These served me well until I gave up commercial growing in the mid 1990’s, mainly to look after my late mother who had increasing dementia, and also to pursue my dream of becoming a portrait sculptor – which enabled me to be around the house more for my mother. I still grew all my own food in the old, larger tunnel, and promised myself that if I ever had the chance – then I would one day buy the very best I could possibly afford, with sturdy real doors – not the ‘roll up’ ones which so easily catch in the wind.
I come from a ‘horsey’ farming family and had always bred horses as a hobby until very recently. Sadly, I haven’t been allowed to ride for over forty years or so now due to increasing spinal problems for which I had life-changing surgery. I have always loved having horses around, and luckily, they’ve always earned their keep! Just in case you might think we’re millionaires – I had a bit of good fortune a few years ago. I happened to sell one extremely well, so I finally decided to go for it and realise my long-held dream of a buying two polytunnels that hopefully would last as long as me. These should enable me to still go on gardening – growing food both for us and for biodiversity, and bringing me a lot of joy, even if sooner or later I become increasingly disabled as doctors have predicted!
Having learnt so much about polytunnels over the years – I went for the strongest and biggest I could afford, both with a very heavy gauge steel frame, cladding strips to hold the polythene along the sides to make re-covering easier when necessary. Both had the toughest heavy polythene covers, one had sliding doors, and the other had hinge-opening doors. If I bought another now, I would definitely go for the sliding doors, although they are a bit more expensive, as they are infinitely variable – rather than only having the choice of fully open or closed.
I bless my good fortune, my lovely old mare (now sadly deceased) and my two polytunnels every day! Even on the very worst of days when the weather is foul or if I can barely bend – I can still sit on a stool and plant or weed, getting my daily dose of Vitamin D-inducing light, healthy microbes and birdsong – not to mention Robins for company! It’s the most wonderfully relaxing therapy as all you gardeners know and is also a reason to keep moving when sometimes it might seem easier not to! The tunnels are also incredibly productive – they provide most of our food here, as well as raising chicks, rescuing hedgehogs, even drying the washing. You name it – they do it!
I know that greenhouses are more beautiful – my earliest memories are of crawling around under the staging looking for creepy crawlies in the lovely old wooden greenhouse where I grew up. But on our very windy and exposed hill here they sadly weren’t an option, and anyway they are twice the price of polytunnels. I’ve tried to make my polytunnels as beautiful as possible although, and full of beautiful flowers, with small pockets of habitat like miniature ponds and log piles for biodiversity, as well as bountiful crops. They’re a brilliant resource for bees, butterflies and all other wildlife which benefits all year round from the dry nectar and pollen producing flowers, while providing me with nature’s free pest control! Frankly, I just couldn’t live without them!
Whether you must beg, borrow, or steal for a polytunnel – or just pay for it by the sheer sweat of your brow like I did – they are well worth it. I worked out a few years ago that any size polytunnel should more than easily pay for itself in produce grown within three years. And if it doesn’t – then you’re not using it properly, and really you don’t deserve it!! If you’re eating your 5-a-day then a polytunnel should save you at least €25-€35 per week on your household budget for a family of four – multiply that by 52 weeks, and that’s the price of a small polytunnel over a year! My polytunnels save a huge amount on my food bill and everything that they produce is always healthy, organic, pesticide-free, sustainable, local instead of imported, super-fresh and full of all the nutrients which Nature intended. Nutrients that are often missing or seriously depleted in tired, shop-bought, imported fruit and vegetables.
Who needs expensive, carbon-guzzling exotic holidays for a brief couple of weeks – when you can enjoy all the abundant beauty and biodiversity in a polytunnel all year round? Isn’t it worth a bit of work and trouble when you can enjoy a result like this? I think so!