 |
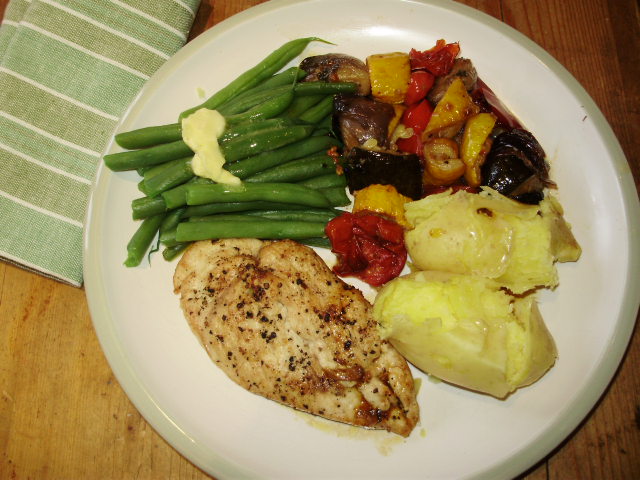 |
| Roast Ratatouille hot from the oven | Roast ratatouille with grilled chicken breast, buttered French beans & Mayan Gold potatoes |
(Or as many ways as you can think of. Every time I make it I can think of another one! It’s another of what I call my ‘convertible’ recipes that’s endlessly versatile!)
If you’ve ever made the classic Ratatouille Nicoise or French vegetable stew – which can sometimes be rather watery and unpleasant – once you’ve tried it this way you’ll never go back to the traditional method of stewing it all in a pan which often means it becomes a shapeless homogenised mush. This way all the vegetables keep their shape and identity – and they all take on a wonderfully toasted, sweetly caramelised edge.
This recipe is seasonal – using red onions, red peppers, tomatoes, courgettes, aubergines, garlic and basil – all from my polytunnel.
Similar to my roast winter root veg that we covered earlier in the year – it’s worth making tons of it as it’s so incredibly versatile either hot or cold – and it’s so delicious you won’t be able to resist it cold straight from the fridge either! A healthy food for late night snackers!
You can eat it hot as a side vegetable with any main course – it’s particularly good with any kind of grilled meat or fish. Alternatively it can be a light lunch dish topped with a poached egg, if you mix in a few chopped cooked leftover new potatoes, heating them in the mix first and then adding the egg. It can form the base of a vegetarian lasagne, be made into a pasta sauce by adding some tinned plum tomatoes and if you have any of that left – it can then become a pizza topping! It can also be a pizza topping just as it is – adding a little concentrated tomato paste underneath it on top of the pizza base and then topping with some sliced mozzarella and some pesto oil (the recipe for that is in June ‘Tunnel to Table’.
Cold – it can be stuffed into sandwiches and wraps, be stirred into cooked couscous, quinoa, bulghur wheat or rice for a quick lunchtime salad or it’s delicious on it’s own just used as a topping on a green salad for dieters or carb watchers. I could go on forever with it’s many utterly delicious uses!
Quantities don’t matter that much – it’s very flexible so you can vary it according to what you’ve got or what you like. We like a larger proportion of red onions and red peppers. Yellow peppers don’t caramelise as nicely as red and aren’t so sweet – so I would use 2 red to every one yellow. We prefer yellow Atena courgettes in it – but you can mix green and yellow or just green are fine too. When you’ve done it a couple of times you’ll discover what proportions of ingredients you personally prefer – so I’m only giving you rough guidelines here to get you started.
It’s really easy. You can get the whole family involved if your children are old enough to use sharp knives safely. It’s a bit fiddly because of all the peeling and chopping in the preparation – but many hands make light work, and it takes no time at all even to make a large batch if you get everyone to help. It’s great to involve kids in preparing and cooking healthy delicious food – that way they tend to continue with that as they get older and start to cook for themselves – rather than resorting to rubbish or ready meals as some teens do. I always make enough to do 2 or 3 large oven trays and then I’ve got lots to use in various ways over several days which saves a lot of time on other days. How long does it take to throw a couple of spoonfuls over some lettuce? – And you won’t believe how delicious it is used in this simple way!
The seasonal ingredients are available everywhere at this time of year, even if you don’t grow your own. Even the discount supermarkets sell organic peppers and organic onions quite cheaply now compared to other supermarkets, although they don’t sell organic red onions yet! Alternatively – they should all be available from organic producers at farmers markets, they almost always have red onions which we prefer – but ordinary onions are fine too. Red onions can be difficult to source at this time of year if you don’t have your own. If we run out – Sainsburys in Newry always have organic red onions and are very handy if you live in the north east.
This recipe is suitable for vegetarians and vegans.
Lastly – it’s incredibly healthy! There’s every possible colour of the rainbow in all the vegetables – which gives you a whole range of health-promoting plant phytonutrients like lycopene, lutein, anthocyanins, etc. and also many essenhtial vitamins and minerals. The olive oil in the recipe helps your body to absorb all those nutrients and contains heart protective essential fatty acids.
Equipment:
You’ll need a very large bowl to mix all the veg together with the oil and the herbs before cooking. A couple of spatulas or fish slices to turn the veg over when half cooked. A sharp vegetable knife obviously – something I’m always particular about is keeping my knives very well sharpened. You’re far more likely to cut yourself with a blunt knife, as you have to use more force to chop things, it’s slower – and you don’t get a clean edge on what you’re chopping.
You’ll also need 2 or 3 large roasting or ‘sheet’ pans as the Americans call them. Shallow ones are better as the veg caramelise better – if they’re too deep the veg can tend to stew or steam, rather than roasting – which is what gives you the wonderful flavour.
Ingredients: (for 2-3 sheet pans)
These quantities are not set in stone – use what you have but this is roughly what I use. Don’t use too many courgettes or they can make it a bit watery and the other veg won’t caramelise then
1-2lbs or 1kg of red or yellow onions any size. More or less really doesn’t matter – we use about 1 kg as they really bump up the flavour and they’re even lovely just roasted like this on their own, with a little thyme.
2 red and one yellow peppers. Don’t use green – they’re disgusting in this recipe (keep those for piperonata)!
A whole bulb of garlic – don’t worry – it loses it’s strong flavour and develops a mild toffee-like sweetness when roasted!
2 or 3 medium courgettes – approx 700g or 1lb 8ozs. I love the yellow ‘Atena’ variety which gives a nice colour contrast and has a sweet flavour – but green ones are fine too. (This is a great way to use up those larger, escaped courgettes – there’s always a few! Just cut into cubes of roughly the same size)
1 medium aubergine or 1/2 a large one
500g or 1lb approx of cherry tomatoes – these give the nicest flavour but larger ones can be halved or quartered depending on size if you don’t have cherry ones.
Plenty of extra virgin organic olive oil for coating the veg.
A good handful of fresh basil – roughly torn into pieces
Salt and freshly ground black pepper – organic if you can get it – like all organic herbs and spices – it’s far higher in the beneficial phytonutrients which give it it’s lovely flavour.
(I use all organic ingredients, which scientific studies have proven are almost 70% higher in healthy phytonutrients and of course are not treated with any pesticides – but the choice is up to you. )
Method:
Don’t turn the oven on before you start as it takes some time to chop the veg – and that will waste energy. Turn it on when you have everything prepared and in the bowl and coated with oil – except the aubergines and courgettes which should be added to the mix at the last minute or they will soak up all the oil like sponges! The tomatoes will be added half way through the cooking time, when the everything else is turned over.
You want all the veg cut to roughly the same size, with the onions perhaps just a shade smaller as they take slightly longer to cook. As you prepare them add them to the bowl. Wipe them first if dirty with kitchen towel – you don’t want them wet so make sure they’re dry.
1. Remove dry skins from the red onions leaving them joined at the base – just cut the dirty root end off but leave enough of the base to keep the whole onion together. Wipe clean with kitchen towel and then cut into halves or quarters lengthways, from top to bottom, depending on size.
2. Remove stalks and seeds from the peppers. A teaspoon is useful for scraping out the insides of peppers to remove seeds etc. Cut into 1 inch/2.5cm squares, or a shade larger. This isn’t critical – no need to measure – it really doesn’t matter once all the veg are roughly the same size!
3. Separate the cloves of garlic and remove skins. Chop or crush garlic and add to bowl.
4. Add the torn up basil
5. At this stage add a good few glugs of olive oil to coat everything nicely. Stir the veg., garlic and basil all around until really well coated. Actually it’s far easier and more effective to just get your hands in and ‘squish’ them around (technical term) – your hands are your best tools! (Saves on hand cream too – as long as you don’t use rubber gloves! – You wouldn’t would you?)
6. Put the baking trays/sheet pans into the oven evenly spacing the shelves, and turn it on to ‘High’ or 230 deg C
7. Slice courgettes into discs or cubes roughly same size as everything else.
8. Chop the aubergines to similar size (Some people salt aubergines before using to remove any bitterness – but I have never found it necessary if they are nice and young and particularly not if they’re organically grown. Doing this can make the whole dish very salty later as well)
9. By now the oven should be up to temperature and ready to go, so now add the courgettes and aubergine to the mix of veg already in bowl and squish around some more. Add a bit more olive oil if necessary to coat everything nicely. Don’t worry about calories here – all the veg will counteract that and the oil forms part of the sauce with the veg juices later. A slight puddle at the bottom of the bowl is ok at this stage, but you don’t want the veg floating!
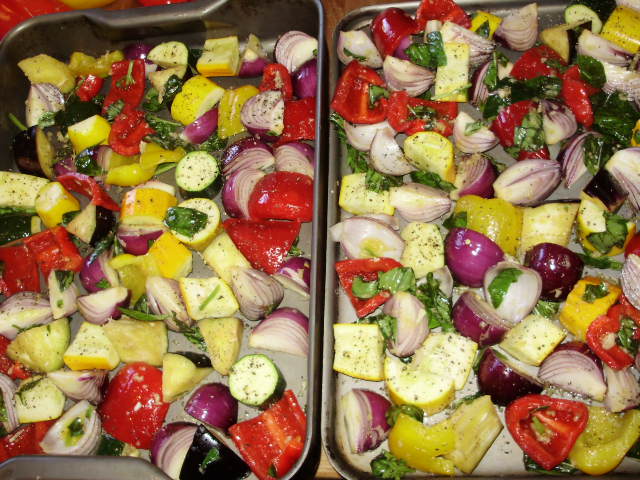
10.Take out the hot trays and divide the veg equally between them without crowding – don’t cram too close together or the veg will steam instead of caramelising (they will sizzle on the trays) Season with a light sprinkle of salt and lots of ground black pepper and put in oven.
11. After 10 – 15 minutes open the oven door to let all the steam out (stand well back) and then close again. Do this again about 5 mins later. The hot oven drives the water off the veg and this is what concentrates the flavour and gives you the lovely toasty edge.
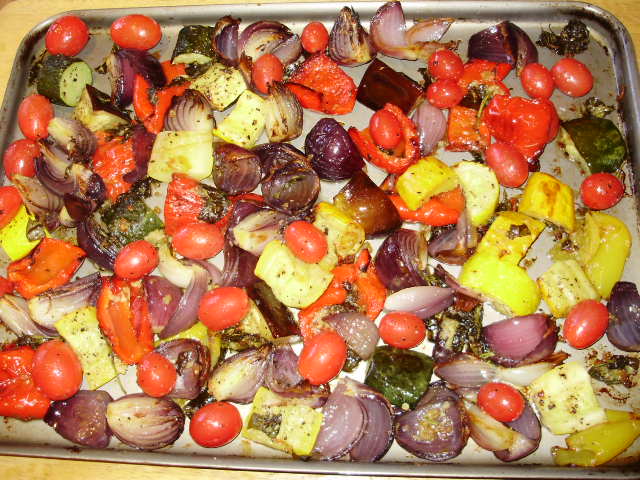
12. After about 1/2 an hour take out the trays, turn the veg over gently as evenly as possible so that the other side of the veg gets roasted, then add the tomatoes evenly between the trays. Return to oven, reversing the order of the trays -ie. putting what was the top tray on bottom and the bottom tray on the top. (My electric oven doesn’t cook very evenly – that’s why I do this – yours may be different, but all ovens have ‘hot spots’!)
13. keep an eye on it now – it needs to be well caramelised – the edges will start to look almost burnt after almost an hour depending on your oven. Try a piece or two of the veg. You don’t want it burned or it will be bitter. I find it’s when you almost think it’s going to burn and daren’t leave it any longer that it tastes best – especially when cold!
14. Allow to cool a little and serve. If you’re eating the rest cold – cover tightly with foil while still warm and leave overnight in a cool place or refrigerate. The resulting steam will mix with the pan juices and make a lovely sauce. Don’t uncover until it’s completely cold, then scrape out the baking trays into a bowl using a spatula so you don’t waste one scrap of those precious ‘umami’ rich juices! Then refrigerate. (You’ll hardly be able to resist licking the pan at this stage – but make sure no one’s watching!)
15. This will last for 5-6 days in the fridge and can be used for all the different dishes suggested above. It’s even more delicious cold than it is hot. A couple of large spoonfuls added to a tin of tomatoes and heated makes a lovely quick pasta sauce.(15 a & b)
If you have a bread maker, most will have pizza base recipes or you can buy ready made pizza bases to make a deliciously healthy homemade pizza (15 c,d &e).
 |
 |
| 1. Peel back dry skin of onions, cut off leaving onion joined at base, cut through base into segments | 2,3,4,5. Chop all veg to roughly same size, crush garlic add torn basil & olive oil |
 |
 |
| 7 & 8. Cut aubergines & courgettes to roughly same size other veg. | 9. When oven up to temp. mix courgettes & aubergines to bowl with more oil to coat if necessary |
 |
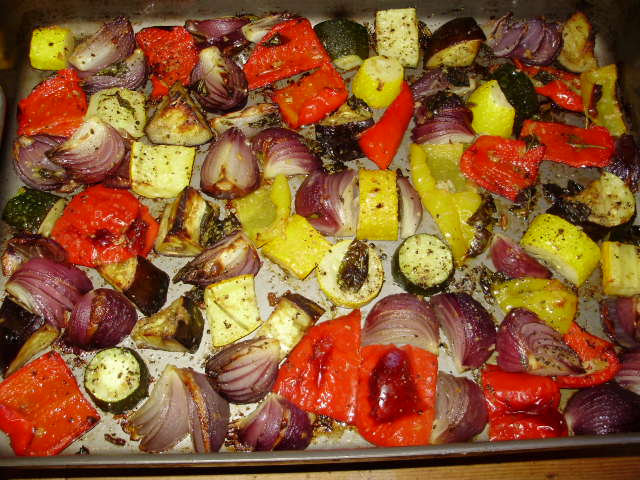 |
| 10. Divide veg evenly between the hot trays, without crowding, season with salt & black pepper | 12a. After half an hour take trays out of oven & gently turn veg over |
 |
 |
| 12b. Lightly coat tomatoes with oil, season & add to trays, return to oven | 13,14. Remove from oven when nicely caramelised but not burnt, allow to cool & serve. Or cover tightly with foil & leave until cold_1 |
 |
 |
| 15a. Weighing approx 400g cold Roast Ratatouille to make a pasta sauce | 15b. Pasta sauce. 400g Roast Rat, 2 tins chopped tomatoes, chopped basil, 1 tsp. muscovado sugar, salt & pepper |
 |
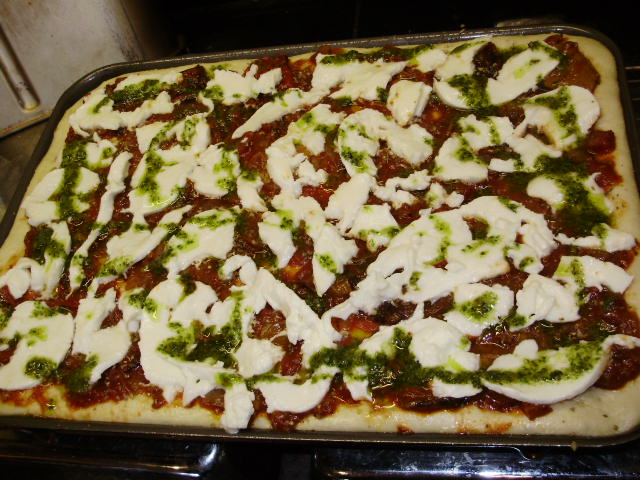 |
| 15c. Roast Rat. pasta sauce topping spread thinly on pizza base | 15d. Top with mozzarella, drizzle with pesto oil, cook 220 deg.C for 15-20mins until golden brown |
 |
|
| 15e. Cooked pizza – the most delicious you will ever taste! |